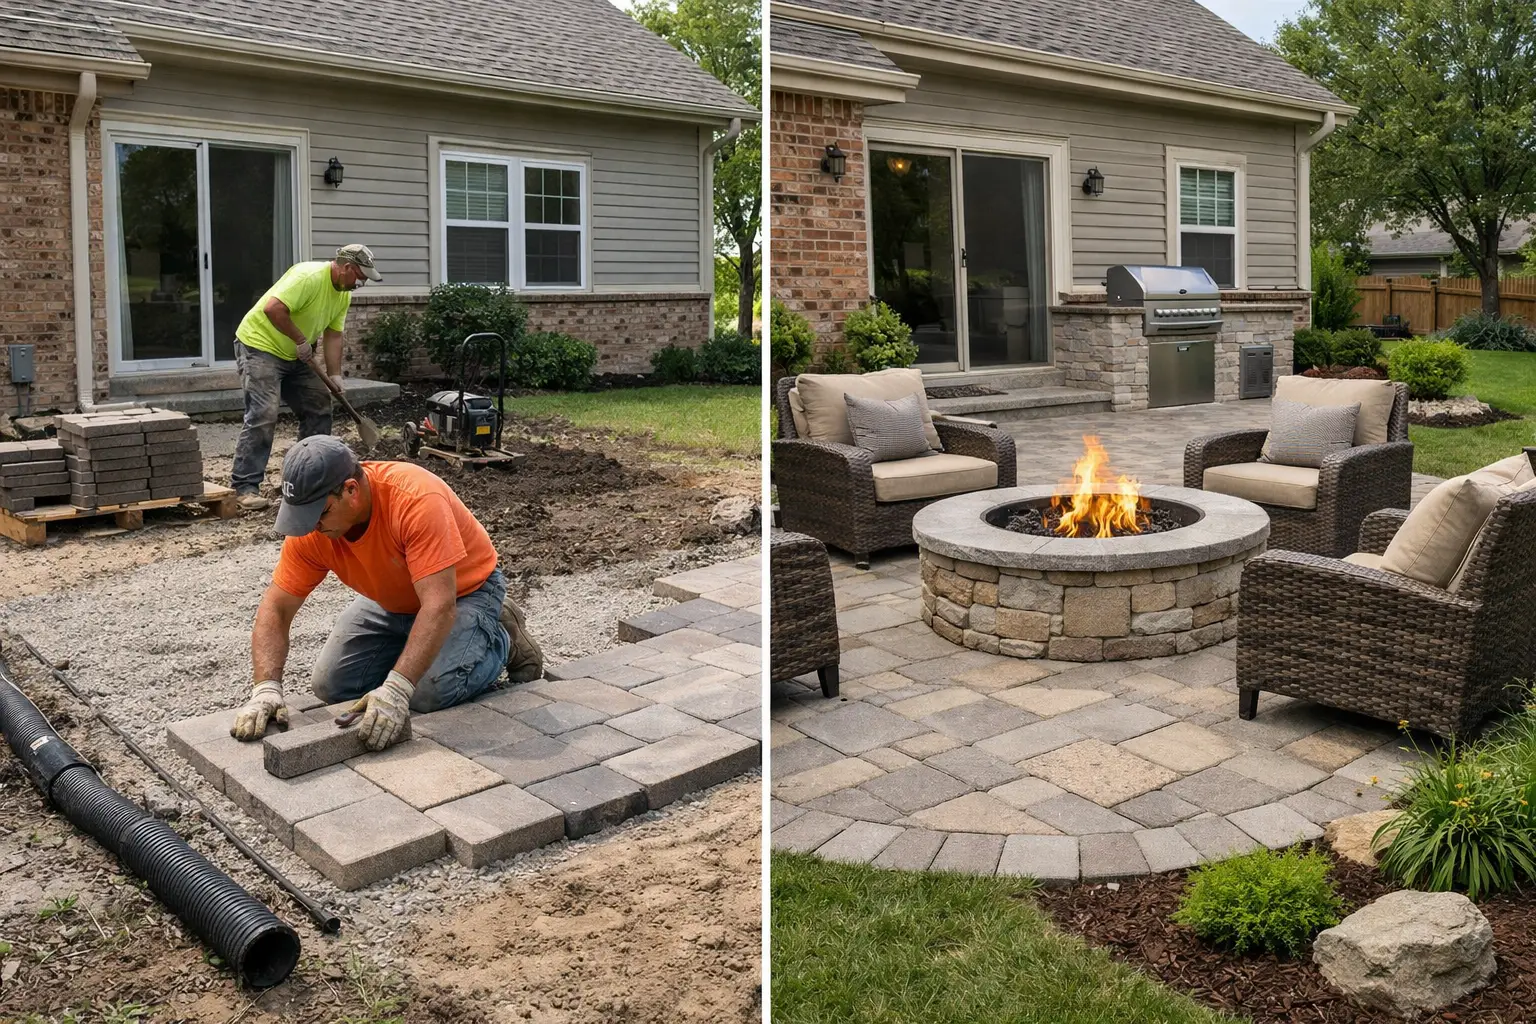
A new paver patio can make a backyard feel like a real extension of the home. A front walkway can clean up curb appeal and give guests a safer path to the door. But the finished surface is only the part you see. What sits underneath it is what decides whether your hardscape stays level or starts shifting after a few Chicagoland winters.
The hardscape installation process should start with a plan for the whole property, not just a choice of paver color. At Revive Your Lawn, we look at how people will use the space, where water goes now, and what needs to happen around the patio or walk so the project looks good and works well for years.
Start With the Yard, Not the Pavers
Before any material is ordered, a contractor should walk the property and measure the area. This is the time to talk through the practical details: Will the patio need room for a dining set, a grill, and a fire pit? Does a walkway need to connect the driveway, gate, and front entry? Are there low spots, downspouts, tree roots, or utility lines nearby?
Here’s what to look for. If water already sits in the proposed patio area after a hard rain, simply covering it with pavers will not solve the problem. In fact, it can create a bigger issue if the finished surface directs water toward the house. You do not want water sitting near your foundation.
In Illinois, this matters because our soil, rain, snowmelt, and freeze-thaw cycles can all move a poorly prepared surface. A good design accounts for drainage from the beginning. Sometimes the right answer is a patio with a gentle slope away from the home. Other yards may need a buried drain, a catch basin, or downspout extensions as part of the larger solution. It depends on the grade and how water moves across that specific yard.
The planning stage is also when homeowners should ask about permits, property lines, and any association requirements. Retaining walls, structures, or projects near easements may require extra review. Handling those questions early helps prevent surprises once work begins.
The Hardscape Installation Process, Step by Step
Once the design, materials, and layout are approved, the physical work can begin. Every property is a little different, but a professional paver patio or walkway installation usually follows the same basic order.
Marking the layout and protecting the site
The crew marks the shape and elevation of the new patio, walk, steps, or retaining wall. Straight lines, curves, borders, and transitions are easier to adjust now than after excavation starts. The planned slope is checked as well, especially near a home, garage, or basement entrance.
A clean crew also plans access before machinery arrives. That may mean using plywood to protect turf where possible, setting aside soil, and identifying where pallets of pavers and base material can be placed. There will be some disruption during a hardscape project, but thoughtful site preparation keeps the work area organized and reduces unnecessary damage to the rest of the landscape.
Excavating to the proper depth
Next comes excavation. The existing grass, soil, old concrete, or failed material is removed to create room for the full system underneath the pavers. This is where many homeowners run into trouble with quick installations. If a patio is excavated too shallow, the contractor may not have enough room for a strong compacted base, bedding material, and the pavers themselves.
The right depth varies by the project. A pedestrian walkway does not carry the same load as a driveway, and a patio near a home may need special attention to finished height and drainage. The goal is not to dig as deep as possible. The goal is to create enough stable support for the intended use and the conditions in that part of the yard.
Building and compacting the base
The base is the backbone of the project. Crushed aggregate is installed in layers and compacted with equipment so it forms a firm, even foundation. This material helps spread weight and gives the patio or walkway a stable layer beneath the visible pavers.
Compaction takes time and should not be rushed. Adding a thick pile of stone and packing only the top can leave loose material below. Over time, that can lead to settling, low spots, or pavers that rock underfoot. The base is generally placed and compacted in lifts so each layer is properly tightened before the next one goes down.
For Chicago suburbs homes, base preparation is one of the biggest reasons to hire an experienced hardscape contractor. Winter frost can expose shortcuts fast. A patio that looks perfectly level in October may start showing problems by spring if the foundation below it was not built correctly.
Setting edges, drainage details, and bedding material
Strong edge restraints help hold pavers in place around the perimeter. Without good edges, pavers can slowly spread outward, opening joints and making the surface look uneven. Edging is especially important on curved patios, walkways, and areas that receive regular foot traffic.
If the project includes drainage components, they are installed before the finished surface goes down. This may include a drain channel near a low doorway, a catch basin in a problem area, or a connection that carries roof runoff away from the patio. The best approach depends on the property. A good landscape should look nice, but it also needs to work.
A thin bedding layer is then carefully screeded to create the final setting surface for the pavers. This layer is not meant to fix a poor base. It is there to help set the pavers evenly at the correct elevation.
Laying, cutting, and locking in the pavers
Now the project starts to look finished. Pavers are placed in the selected pattern, with care taken to keep lines straight, curves smooth, and transitions clean. Border pavers can add definition, while different colors or patterns can help separate a dining area from a walkway or entry path.
Most projects require cut pavers along edges, steps, or curves. Clean cuts matter. They give the installation a finished appearance and avoid wide, awkward gaps that collect debris. When the field pavers are installed, jointing sand is swept into the joints and compacted to help lock the surface together.
The exact joint material may vary. Traditional joint sand and polymeric sand both have uses, depending on the paver system, drainage needs, and project conditions. Polymeric sand can help reduce weed growth and washout, but it still needs proper installation and occasional care. No outdoor surface is completely maintenance-free.
Finishing the Surrounding Landscape
Hardscaping should fit the rest of the property rather than look dropped into the yard. Once construction is complete, the surrounding area may need grading, sod, seed, mulch, planting beds, or landscape lighting. These finishing touches make a major difference in how the project feels when you walk outside.
Lighting is worth considering before the patio is finished, not after. Low-voltage path lights, step lights, or subtle patio lighting can improve safety and make the space more usable after sunset. Planning wires and fixture locations during the project is often cleaner than trying to retrofit everything later.
For a front walkway, the final details may include repairing disturbed lawn areas and making sure the path meets the driveway or porch without a trip hazard. For a backyard patio, it may mean creating a smooth transition to the lawn and checking that nearby downspouts are not dumping water onto the new surface.
What Homeowners Can Do Before Work Begins
You do not need to manage the construction, but a little preparation helps the job move smoothly. Clear patio furniture, grills, planters, and personal items from the work area. Let the contractor know about sprinkler heads, pet fencing, invisible dog fence wires, or anything buried in the yard that may not be obvious.
It also helps to discuss access, parking, gates, and pets before the start date. If the crew needs to bring equipment through a side yard, moving vehicles and keeping gates accessible can save time and protect your routine. A good contractor should communicate what to expect, where materials will be staged, and how the site will be cleaned up as work wraps up.
A Finished Surface Is Only the Beginning
After installation, give your new hardscape a quick look each season. Keep leaves, soil, and mulch from building up in the joints. Watch where roof runoff goes during heavy rain. If you notice a small low area, shifting edge, or washout near a drain, addressing it early is usually easier than waiting.
For Naperville-area homes, Downers Grove homeowners, and families throughout the western suburbs, a well-built patio or walkway can add real daily value. It creates a cleaner route through the yard, a better place to gather, and a more polished look around the home. The best first step is a walkthrough with someone who will look below the surface, explain the options clearly, and build the project around how your property actually works.